A strong hanging hook that is safe to use outside
Step-by-Step Directions
1.Gently take apart the solar garden lights. You want to remove the top part that contains the solar panel and the light bulb from the plastic stake or ground base. Keep only the top pieces that are necessary for the light to turn on and charge.
2.If you want to change the color of your wire baskets, take them to a well-ventilated area outside. Spray them evenly with your choice of outdoor spray paint. Let the baskets dry completely before moving on to the next step.
3.Take a look at the bottom of your wire baskets. You need the solar light tops to fit snugly into the center. If the opening is a bit too small, use your wire cutting tool to carefully adjust the wire pieces until the light fits securely.
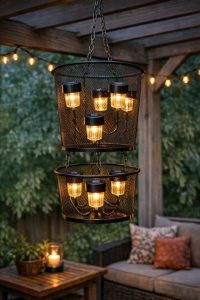
4.Push the solar light tops into the center of the bottom of each basket. To make sure they never fall out, use your plastic twist ties or small zip ties to strap the lights tightly to the wire frame. Trim any extra length off the plastic ties so the final product looks neat.
5.Measure how low you want your lights to hang from your roof or pergola. Cut your metal chain or strong rope to that desired length. Attach a piece of the chain or rope to the top rim of each basket so that you have a secure loop for hanging.
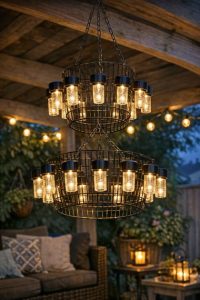
6.Find a strong beam on your patio ceiling or a sturdy spot on a wooden pergola. Install your outdoor hook safely into the wood. Hang your finished wire baskets from the hook. You can hang them all at the exact same height, or you can make the chains different lengths to give the chandelier a more creative, layered look.
7.Leave the chandelier out in an area that gets plenty of direct sunlight during the daytime. This allows the internal batteries to charge up fully. Once the sun sets, check on your creation to ensure the lights turn on automatically and illuminate your patio beautifully.